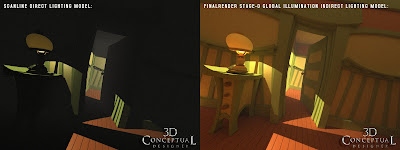
 Here is a stark toon image showing the limit of a direct light model on the Left. The bounce light is what brings the scene to life on the right. This was a very early image I did with Final Render Stage-0 back in 2001.
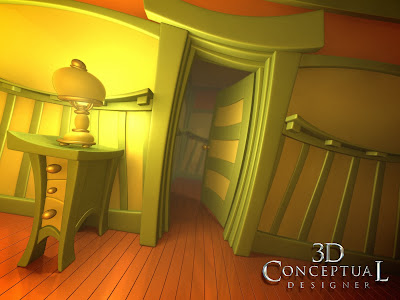 I took the same toon scene I designed and built a decade ago into the current version of FinalRender 3SE, and rendered out this example. I also added a turbo-smooth to a set of parts to round them out a bit for this experiment, though the scene was not a quad sub-b model the parts worked since I gave them all many segments to bend smoothly for that toon look of 'no straight edges'.
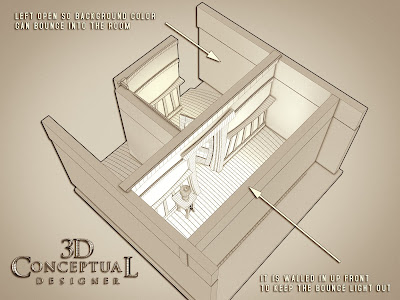 This geometry rendered view shows that I left a gap in the back room to leak light and color since the GI[ Global Illumination] takes the sky outside into consideration. I also blocked off the inner room with a wall to give it that darkness with almost all indirect light.
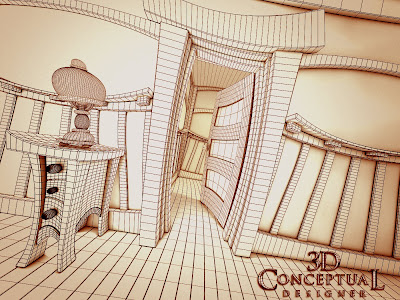 This Camera view shows the segmenting I performed on the parts to get them to bend without too much faceting on the curves. Also I latter learned that the GI renderers like even little polygons, and do not like long thin ones, so segmentation is the norm for me.
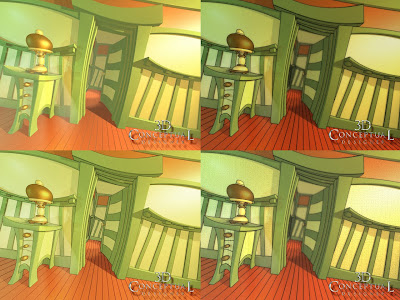 Here is an image from a decade ago using a toon shader plug in to achieve some various looks in the little toon scene I made.
Behind the Art
Toon Style Ink and Paint and Lighting Look Tests
Back in 2001 Global Illumination 3D Rendering was just starting to come out 'en mas, and Final Render for 3DS max had just come out. I had built out a little 3D set to test out some ink and paint looks and when the indirect lighting ability was added I jumped on it and was an early adopter, and immediately began experimentation with various scenes I had built to see the looks we could get.
Above you can see the basic structure of the toon styled room I designed and made. the fun shapes and exaggerated bends to soften up the hard edges to a toon world. I then experimented with a few looks with too shading with an ink and paint outline and some various fills including some textured passes.
I keep the scene as a base for various experiments and renderers to test to the speed etc. One way to keep your skills evolving is to use them constantly. Open up a scene and play around even more, keep going. Every hour in 3D you will learn something and have a good take away for the next round. Enjoy folks.
Cheers, THOM


No comments:
Post a Comment