Showing posts sorted by relevance for query Herbie. Sort by date Show all posts

Monday, June 24, 2013

Project Review: Herbie Fully Loaded PART V- Motion Graphics Herbie in Glass [X-Ray] 2005

The same animation move is seen in my reel, here is frame one rendered out in a glass material.


As we pass by we can see into the bonnet and the floor pan area.


A full interior was built out as well as some "Lip Doors" from a 54' were snuck in as I am a VW owner and love the 54'.


 The side shot at the door.


 The final frame in this Motion Graphics piece.


Here is a frame with the virtual 3D Herbie fully rendered out.


Project Review
Herbie Fully Loaded PART V
Motion Graphics Herbie in Glass [X-Ray] 2005


Client: The Walt Disney Pictures via The Cimarron Group.
Art Direction: myself.
Project Date Winter 2005

In this, my fifth posting on the work I did for the newer[ now old!] Herbie film starring Lindsey Lohan and Justin Long, today I've posted a look at a Motion Graphics [ MGFX] render pass that I planned to do in glass of that famous 1963 VW.

If you check out my reel on the link to the right you will see a transition we did for the Herbie from fully rendered to an X-ray type of material. Originally we planned to go glass so the team I worked with was familiar with the X-Ray PPK I did at BLT prior and wanted to see that look in motion.

 However back in 2005 when I built this motion graphic piece the render times were not forgiving so it was deemed too long a render for the production. What is nice is I opened the scene in 3D Studio Max 2013, hit render and they went very fast as the software and hardware has advanced quite a bit in the last 8 years so I was done to 8 minutes a frame in glass at 3/4 HR rez.

X-Ray modeling is done when you know up front that you will see thru the objects so you build out everything internal and two sided, and for Herbie we had all sorts of plans to fly thru the tailpipe inside the engine and around the interior and speedometer.

I included the painted render pass as well as a reference for the transition.

My First four other posts on the VW build itself, are here, along with this and this,  and this.

Cheers, THOM

Tuesday, December 15, 2020

Personal Project: Volksrod- Vintage VW Bug Hot Rod Project PART II - Work In Progress 3D Rendering Exterior

 Low angle 3/4 Side view of my Volksrod. You can see the Ribbed Semaphore signal out in this render as well.

  Low angle 3/4 Back view of my Volksrod. You can see Kafer bar as well as the Vintage Hella Brake Lights with Rock guards.

  Low angle 3/4 Passenger Side view of my Volksrod. The re'pop 20" and 22" wire wheels really give it a good stance at this angle IMO.

  Low angle Front View of my Volksrod. You can see the partial beam in the refection I added in recently here as well as the new "face" with lighting changes.

  Bird's Eye View of my Volksrod.

  Low angle 3/4 Side-Front view of my Volksrod. You can see the performance pasts under the engine and trans-axle as well as the new jack points in this shot.

  A direct Side View profile on the Volksrod concept.


Personal Project
Volksrod
Vintage VW Bug Hot Rod Project 
PART II - Work In Progress 3D Rendering Exterior


Personal Project:  Volksrod- Vintage VW Hot Rod Salt Flat Inspired Custom


      This post is my second in a series on  my personal Volksrod project [ Vintage VW Hotrod]. This post is also a Work in Progress [WIP=Work in Progress] post too, so even thought I am near done with the exterior as well as many updates on the twin supercharged motor, I have yet to fully address the interior and I am still using the Herbie stock '63  parts inside for now I built many years back for the Advertising for Herbie Fully Loaded.

     I have moved into full colored renders for a few months as I finesse and continue to model, and I have spent most of my time on this Tuxedo black and chrome version. Also, I have spent a lot of time fine tuning the body parts as well as adding in details for placeholder objects from the earlier build as I did start with the 1963 Herbie I made and wanted more accurate parts.

      In my continued 3D Modeling in 3DS Max, I have focused primarily on the seen exterior, but I have also revised a lot underneath in both the front and rear suspension areas that are not fully seen in many shots but they are made more accurate for the real build at some future point in life. 

     On the front end, I rebuilt the Pan head where the torsion bar front suspension attaches to it, so I could mock up how the Ford Deuce rails would attach in there, and added some proposed bracing and attachment points. I also rebuilt the back Trans-axle Horns on the rear pan, as the Herbie mock up was not quite accurate enough to add in the Solid Mounts for the Trans-axle I also added. 

     Also while under there I added some Vintage performance parts, including a Modified 356 Porsche dual leaf-spring Camber commentator on the Swing Axle, as well as a Engine bar or "Kafer" racing bar on the engine itself. You will also see a vintage Gene Berg Oil sump in there now as well underneath.

    Since my last post I rebuilt the engine from the 40HP stock Herbie placeholder I had in there with a high displacement [ 2332cc] adding a proper fully equal length merged with stinger[must have!]exhaust system, along with adding in Dual AMR 500 Superchargers with a custom belt system with a custom center mount fan shroud.

     I fine tuned a lot of areas on the body smoothed out the top curve, the rear quarter window, and front quarter panel and added in the Zwitter crotch-coolers. I rebuilt the jack points more accurately, and adjusted the inner fender well louvered panels out front to line up better on the pan. I also took off the headlight eye brows and added 356 Porsche styled headlight grills with matching Hella fog lights with grills below them now. I also used that fog lamp build to add in taillights out back with grills as well.

     I also cut into the B-Pillar and added in early Ribbed type Semaphore turn signal arms into the build. I had to chop those a bit as they will need to be shortened for the real life build I plan in the future too. I love Semaphores, a must have on the build and the ribbed versions are available as reproductions so they are available along with most Split sheet metal from Europe.

     If interested , I run a Vintage VW's Chop Top group on Facebook for all types of VW chop Top cars, there is a permanent link on the side bar, and you can click here as well as it has some earlier renders in raw steel I did too HERE.

     Look for more posts as I continue with this personal project on the interior next with Porsche Speedster 356 seats on deck next.
 
     If you have a 3D Design , 3D Modeling, or 3D Animation needs on a  freelance basis, I am set up and and ready to go as I have been a remote studio for over a decade. All referrals are highly appreciated!

You can view PART I here.


        Cheers, THOM

Monday, May 4, 2020

Personal Project: Volksrod- Vintage VW Bug Hot Rod Project - Work In Progress 3D Modeling PART I


 Volksrod Work in Progress 
3/4 Front shot shows the custom extended headlight buckets with 60's Peanut signal light on top.

Plan View directly from above shows the overall proportion of the chop. About 7" chop so quite a "Mail Slot" look, as I want that Bonneville Flats feel the Volksrod.

  Low Side View on the Cyclorama background stage gives a nice grounding to the blocking model with a simple dark surface with a lightly blurred reflective shader from Cebas Final Renders SE product.

  This underside view shows that the majority of parts have been blocked out. I recently rebuilt the rear trailing arms to be from an early 1957 VW, so all parts were modified from the Herbie blocking used earlier.

  Low Front view is one of my favorites I rebuilt the hood to add in the 54 louvers as well as adding a Safari windshield.

 
 Low Angle 3/4 Rear shot showcasing the newly built Early form 18" front , and 20" rear 30's styled Raw Steel Wire wheels and Pie Crust tires I plan to use.

 A High Birds Eye view a bit over the front louvered hood and Early Ford I-Beam front end.[taken from this model here]
Note: I will use a second set of doors to get the quarter windows to roll down using all stock mechanics, though they will be a 1-piece widow conversion and not have chopped vent wings like in the doors.


 A Birds Eye elevated Side view. Remember this is still a WIP[Work In Progress] so there is massaging of the virtual metal work to remove flat spots[ tops of door frames] and fix up the panel gaps[ Hood to front cowl] etc.

 A 3/4 view of the Side and Back showing the newly grafted in Split Window section and louvered Deck-lid. 
NOTE: the stock single 40HP engine in there is a placeholder for now , as I figure out the mill specs: Dual 48 IDA's , or maybe a DLI Supercharger, etc.


Personal Project
Volksrod
Vintage VW Bug Hot Rod Project 
PART I - Work In Progress 3D Modeling


     I have a few automotive personal projects I have tinkered with over the years along with many Business Automotive work. Being a Gear Head, and graduate from Art Center in the Transportation Design program I thoroughly love all things automotive, especially old cars and Hot Rods. Those who know me , know my passion for Vintage VW's as well. Having owned many cars with over a dozen being vintage VW's the subject matter is one that is very easy to get onboard with.

Link to Super Sized Image above is here on CG Society.


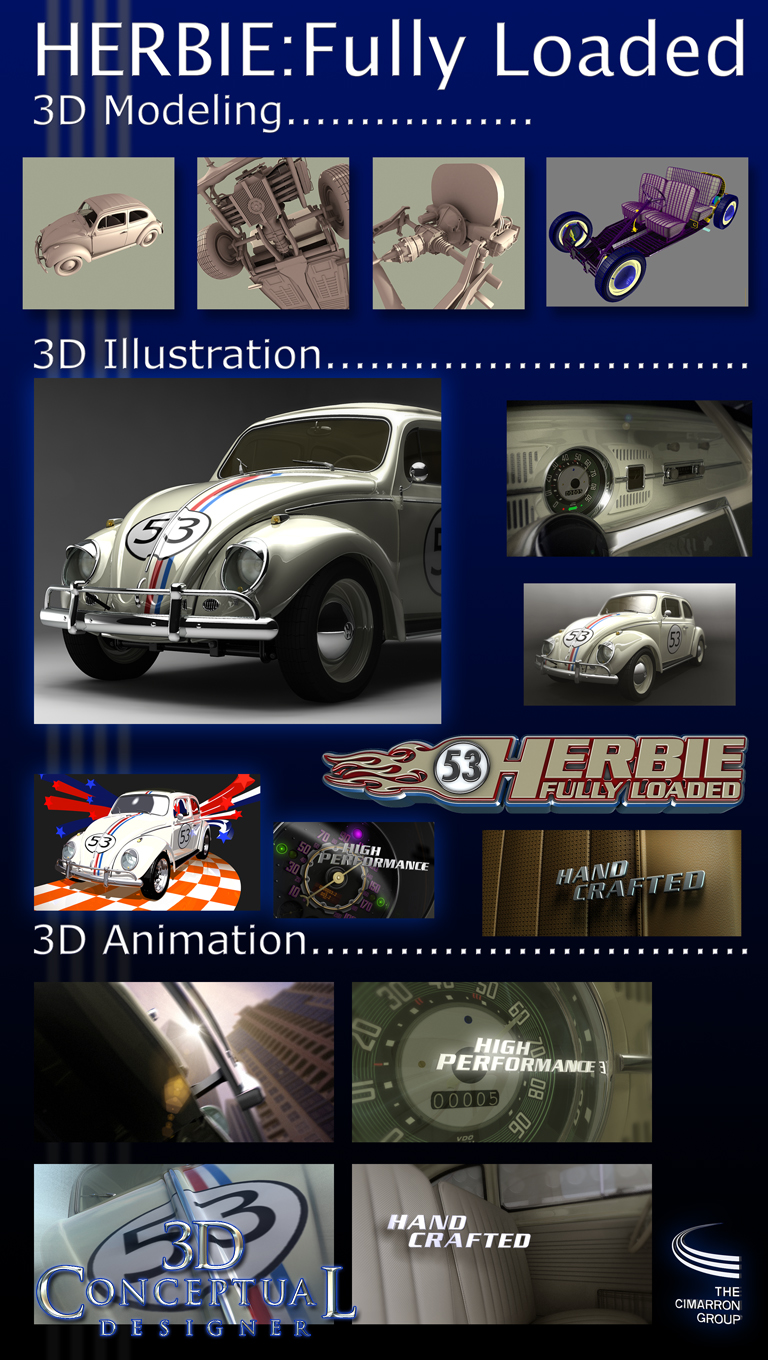
     Recently with the Covid-19 shutting down so much business, I have had too much free time , so when not looking for work, I am tinkering on my ongoing Volksrod project. A bit of history; I built a 3D VW bug [ 1963 Type 1]for the Herbie film 'Herbie Fully Loaded" while I was working as 3D Design Director at The Cimarron Group in Hollywood back in 2004. This was the first full model with interior and exterior as well as undercarriage and suspension I built. Since this model was rendered with cartoon shaders and used for both Print Posters , and 3D Animations in the TV Commercial spots it needed to have more than just the exterior skin built. 

 My 3D Herbie Fully Loaded work from a while back.

     I have since used this 3D VW model for two custom automotive projects, the first being my Bugster, which is a combination of a Porsche Speedster [ which I have also built in 3D here ] , and a Chop Top similar to the coach-built  Volkswagen Type 14A (commonly known as the Hebmüller Cabriolet of the late 40's. You can view PART I here , and PART II here.  The second is what I have posted today, the Volksrod.


 Bugster Custom VW
Hebmüller'esque with 356 Porsche parts.

     For those unfamiliar, Volksrods are a branch of the custom VW world that take their queues from the traditional Hot Rod world of the 1950's and onward. Similar to a Deuce Coupe, the cars are stripped of fenders customized with a Chop Top, or a Channeled Frame, and a sectioned body or a combo thereof. As with Hot Rods , you can find some are are High End customs , all the way to Garage "Rat Rods" some unfinished for life.

    This post is a WIP [ Work in Progress], so the work has many hours left on it. A few years back , I uploaded a short introduction video showing progress,and since then I have doubled my time into this personal project. 

     The purpose is to virtually build out the car prior to building one in real life , so I can work out the details before cutting begins. Think of this like a 3D Blueprint for the builder.

     If interested , I run a Vintage VW's Chop Top group on Facebook for all types of VW chop Top cars, there is a permanent link on the side bar, and you can click here as well.

Look for more posts as I continue with this personal project.
 
     If you have a 3D Design , Modeling, or Animation need Freelance, Part Time or Full-Time I am set up and and ready to go as I have been a remote studio for over a decade. All referrals are highly appreciated!


        Cheers, THOM

Friday, November 18, 2011

Project Review: Herbie Fully Loaded PART IV: Motion Graphics Cards 2005

 All cards but two, were a low angle straight on view, but this card shows a frame from a 60 frame slow gimbals animation I also did.


 The only cast members name we did a card for was this Motion Graphics piece for Lindsay Lohan.


 A 3D Coming Soon AV_MGFX card rendered out in 3DSmax for the final trailers.


 As we inter-cut to the shots of the virtual Herbie, we get these tag-lines.


 The main Walt Disney Pictures AV card I did in 3D for the project.


Here is a MGFX card for the main Title, done at 5K wide for a quick single frame slam.


Project Review
Herbie Fully Loaded PART IV
Motion Graphics Cards 2005


Client: The Walt Disney Pictures via The Cimarron Group.
Art Direction: Paolo Ledesma.
Project Date Winter 2005

In this, my fourth posting on the work I did for the newer[ now old!] Herbie film starring Lindsey Lohan and Justin Long, today we look at some Motion Graphics [ MGFX] 3D cards I did for the AV team at The Cimarron Group back in 05.

I build out a full 3D X-ray inside and out model of the Love Bug itself., so being a VW geek, and having owned over a dozen  early Type 1's, this was a favorite to do, so adding in these MGFX cards was a bit of follow up for the TV spots.

Simple straight forward chrome logos with a nice simple warm to cool, soft reflection to them. A front font with a holding device back plate in a gold metal is always a favorite these days[ the last decade.... be honest!], so I was directed to do that again on this project too.

My First three other posts on the VW build itself, are here, along with this and this.

Cheers, THOM

Monday, December 27, 2010

Behind the Art : Herbie VW Speedo Buildout

A Camera view of the 3D file I made for the texture map.


The finished texture adjusted with drop shadows etc. from Photoshop.


A screen shot of the 3D speedo body ready to Boolean out the holes.


An exploded view showing all the 3D parts that are in the Speedometer 3D Model used in the trailers.

A finished render from the trailers we did.


Behind the Art
1963 VW Herbie Speedometer
build out for the Theatrical Trailers.

I have posted on the Herbie VW model I built for the trailers for the Lindsay Lohan film back in 2004 while running a 3D department at The Cimarron Group and here qwe can llok at the build out of the Speedo for that project.

We had some ideas where we needed to get real close to the speedometer and being a VW affectionate myself this was a pure joy to work on with this level of detail.

Above you can see the process I had in building out the separate parts for the VDO Speedo found in a 1964 VW, and I built out the texture map for the face in 3D first since it was all custom fonts and needed the hand built approach to get it right vs a photo.

WAY TOO MUCH FUN!

Cheers, THOM

You can view my prior posts for Herbie here, and here.

Wednesday, November 11, 2009

Project Review: Herbie-Fully Loaded MGFX


Client: Walt Disney: via The Cimarron Group
Art Director: Eric Counter
Project Date: Fall 2004

I had down time at my prior employer and decided after hearing that a new Herbie movie was coming out to practice my quad modeling technique after I modeled my first car the Lotus Elise. Now the VW bug is one of my favorite cars, and having owned over a dozen vintage VW's myself, I was excited to build out the car.

I started with the body and built out almost every part, including the floorpan, front and rear suspension, interior, engine, and most every little piece. A typical car takes about two weeks to build, or 80 Hrs from scratch. This one was right around that time to complete.

For the Trailer, I sent out the car to be rigged and animated by Dean Fowler at Machine Films. Once the animation was done, I rendered it out using a "Cartoon" shader to look like a posterized 70's feel that the Film Producers were wanting. I used Cebas' Top line GI Renderer, Final-Render and Final-Toon.[ Permanent Linked to the Right>]

A few years went by and I met with a fellow A.C.C.D. alumni Jerry Garns and we talked about automotive lighting as we worked on a few Honda Accord spots with the virtual Photography. I implemented what I had learned and I did "Herbie Black Tie". Funny now Volkswagen has incorporated the "Max" character a 1964 VW into the current advertising campaign.

Cheers, THOM

Link to Trailer is in Post Title above or Paste in text below into your browser:

http://www.youtube.com/watch?v=3SdNW3_Sh6E

Monday, November 30, 2009

Behind the Art: Herbie Fully Loaded


Behind the Art: Herbie-Fully Loaded

I am often asked where do I start with an automotive virtual image so I have this brief outline of what I do to create an image of a virtual photo-real car.

Design Phase:

I am professionally trained to design a car from scratch, but most often, I build existing automobiles.

Unless the manufacturer hands you 3D data, you need buy or create the virtual model yourself, and having been trained in automotive design is what I use in this step. I also have owned over 40 cars and over 15 have been VW's so I have personally restored and wrenched on a lot of VW's which gave me a great advantage with a head start for Herbie.
This step involves both knowing every part of the car itself, inside and out, and knowing how it is constructed, and as a trained Transportation designer this is what I do best.

Build [3D Modeling] Phase:

Getting a 3D Model made involving a scan will run around $25,000.oo-$50,000.oo for just the exterior, and about the same for an interior. This does not include the engine, suspension or undercarriage usually, but an indication of them. I build from scratch to scale and "On Model" for around $8,000.oo and up.

I build part by part and start with an accurate measurement of the car and block out the wheelbase and overall bounding box so proportions will be accurate. I then move to all pieces needed for the work at hand. I always work bigger parts to smaller ones.

Materials Phase

As I have down time, I practiced with all materials needed to render out a typical car. Most are straight forward with glass and paint taking the longest to perfect. I have used Pre-made shaders, and find most are limited so I build my own. I have a library of automotive shaders ready to go for setting up a photo shoot quickly.

For the Mitsubishi pitch I helped win at The Cimarron Group for The Traffic Agency, I had weeks of time perfecting metalic paints that when I had just 4 Hours to create images for an end of day pitch, I was able to deliver for under $1000.oo. with an online 3D Model form 3Do2.com

Virtual Photo shoot Phase

Setting up the virtual sound stage is a mirror of a real one. The techniques used are basically the same. A common misconception I have ran into is that clients sometimes think that you can buy a 3D model drop it into 3D program, hit render, and it is done. That would be like you going to Hertz renting a car driving on to a soundstage and taking a picture with your Casio for a photospread for a client. You would be fired! All automotive manufacturers use professional photographers for a reason, and virtual photography is it's best when you are consulting a professional photographer[ best thing I ever did RE: 3D cars!]

Rendering Phase

Once you have set it all up the computer calculates the lighting and materials on the geometry and renders out the image or movie sequence you have set up. Smart 3D allows for any image to be rendered out larger with exact contitions from the first, as if the photo shoot was perpetual.

Retouching Phase

Every car image you see in print is retouched. The art of retouching itself is a very specialized field and even vendor to vendor there are certain "techniques" that will be in all products from each manufacturer. As a virtual Image I give the Smart 3D channels and masks, so the time factor for retouching is always less expensive.


Cheers, THOM

Wednesday, October 17, 2012

Project Review: Hyundai 2009 Virtual Car Remodeling PART I

 Here is the final Hyundai Sonata Headlight assembly Model as delivered for the project.


 The base 3D Model for the headlight with subdivision removed.


 Here is the final smoothed 3D asset. I did not smooth the honeycomb reflector object as it was not needed.


 An overhead shot of the base model.

  Here is the Turbo-Smoothed Model with the setting at three subdivisions


Project Review
Hyundai Sonata 2009
Virtual Car Remodeling PART I
 
Client: Hyundai via 2HM[ Two Headed Monster]
Producer: John Busenberg.
Project Date: Summer 2009.

When I was in-house in Hollywood at The Cimarron Group, I was called down to 2HM[ Two-Headed Monster], to assist for two weeks in a Hyundai project where the virtual car models they received, were very problematic and required a good amount of full remodeling so that they could do the website configurations and the television spots with these virtual cars.

I had done a few automotive virtual car shoots for Herbie, Lotus, Honda, Mitsubishi, and for LandAirSea Designs before, as I hand built Herbie, the Lotus, and Marek Djordjevics Landairsea.com  Supercar from scratch myself, where the Honda and Mitsubishi were scanned in.

 I also worked on site for the two weeks at 2HM, which was a very nice change up since at Cimarron I was  Department of one, and work was always drenched in solitude, so I got to sit with a big group of 3DS users which was very nice!

So for the first post in this work, I have a quick model I started with, which was to remake the complex headlight assembly for the Sonata model. 

It was build all subdivision so they could Turbo smooth the object to get a perfect surface.

I will have added posts covering the body and interior work I did on various models since they did the whole 2009 Hyundai lineup I worked on over half the cars. Fun stuff!

Cheers, THOM
    

Wednesday, November 23, 2011

Project Review: Little Miss Sunshine 3D VW Bus for Cinema Expo 2007

 
 The side view of the 3D Little Miss Sunshine VW bus model as delivered.


 A color render[ never used], to test the surfaces.


  Here you can see the base vectors I create to build from in 3D, here I have four: Front, Back, Top and Side.


 A 3/4 Worms Eye view of the bus, I did throw the front Torsion Beam in their, since this was a head on shot.


 A Quad view of the base mesh for the bus, you will notice the door handles are high rez, they were from Herbie.
 

  Mesh- Smooth is set at 2 in this ambient render of the VW bus I built.


 A side view of the VW bus I built for Little Miss Sunshine advertising.[ Note the dent below the door- I ran out of time]


Project Review
Little Miss Sunshine
3D VW Bus for Cinema Expo 2007

Client: FOX Studios via The Cimarron Group
Art Direction: John Zaffarano.
Project Date: Summer 2007.

While at The Cimarron Group back in 2007, I worked on a few Cinema Expo presentations for the International Division headed up by John Zaffarano, and I had to build the VW bus from Little Miss Sunshine for an animated piece their own 3D guy was doing. 

Here is the catch, I had 8 Hours to do it. Bear in mind a good automotive model from scratch takes about a week, or 40 hours to get a full exterior done, so one fifth that time was a real challenge.

I did have an advantage in that I had built a VW bug for Herbie here, and I could use a few parts from that model for the details here, suspension, door handles etc, but for this one I did all parts as Quads so they could be smoothed once their team took the model. I also have the advantage that I am a Transportation Grad who happens to know a lot about VW's and have owned a Bay Window bus, this same year, so it was from memory for a bunch of this.

As a note, if you look below the passenger door you will see some rippling in the body, and since this was a long shot to a close up on just the front end of the 3D Virtual Bus, and it would not show, and I had only one day to do this all, I was not able to fix it in time for delivery, and that was discussed and expected with one  fifth the time to this.

I loved the challenge of trying to get a car done that fast, it teaches you a whole bunch, on how to run that fast.

Cheers, THOM