Tuesday, May 14, 2013

Project Review: Disney Interactive- The Lost Family Tree: Visual Development 1999 PART I

 Interior of Tiggers Treehouse
A 3D Blocking Model is a basic representation of a 3D or 2D layout scene. Proportions, staging and design are what are locked in, as all detailing comes much later.


 A reverse angle shot shows that the details were not extended to the other side of the room as seen in the faux chair back on the left.


 A side view render on the bed side of the room with Tiggers drawing spring "bounce" stool in the foreground.


 A Birds-Eye extreme down shot to show the whole sic wall full interior set I blocked out for the Tigger tree house for the Development work from 1999.


 Here is an original render from back in 1999 of the exterior set with what I referred to blocking stage Two: This had more details mocked up like bricks and separate parts for the various boards and such.


Project Review
Disney Interactive- The Lost Family Tree
Visual Development 1999 PART I

Client: Walt Disney Interactive[ DI ]
Art Direction: Myself.
Project Date: Summer 1999.

I worked in-house at Walt Disney Interactive back from 1996 to 1998 as a 3D Art Director on their big product back then, a multi-disc CD-ROM game[ Nodes and Rails Old Time] called Virtual Magic Kingdom, and once I left DI, I moved across the street to WDI, [Walt Disney Imagineering] as a contractor Imagineer for a few years. However I had at that time a half day commitment from DI to freelance in the mornings, so I was called back to help out with a new game based on Pooh and The Hundred Acre woods called The Lost Family Tree.

I had worked in 2D TV Animation in an Art Director/ Conceptual Designer capacity in the past so I suggested that we block out the entire 100 acre woods locationsmatching each location to the original watercolor and ink backgrounds from the original film first. They all agreed so I was off in blocking out the game.

Each location had an interior and exterior set, and since I was matching 2D artwork the interiors were exagerated to make them bigger than the outside structures would allow so I made an exterior full 3D world, and all interiors were separate 3D sets, and we would transition in game play from the outside set to the interior ones for some continuity.

What you see today is the basic blocking for the main Tigger house with the interior shots and one original exterior rendering frame from 1999 rendered in 3DSmax version 1.

3D Blocking is similar to 2D blocking which I did for all my Phantom 2040 work, as it allows you to lock in the shots with minimal geometry, and once the basic proportions are done, each location can be handed off to a 3D team for final high-rez re-modeling efforts.

In this case DI played with the thought of using the 3D blocking to create 2D layouts grids so the look could be a watercolor original feel and not 3D, but in 1999 this was too costly and the game was shelved for good.

A super fun project as I got to rebuild the main sets from one of my favorite Disney films.

Look for added posts in this series in the future.

                                                                                                   Cheers, THOM

Thursday, May 9, 2013

Project Review: My Babysitter's a Vampire: Disney Channel: Main Title 3D Build-Out and 3D Animation 2011

 A slammed 3D Title with 3D Motion Blur as rendered and set off to Motion Graphics Pro Tom Kositchotitana.


 A few more frames into the quick title slam rendered in HD.


 Around 1/3rd of a second in it has seated[ 6-9 frames for a typical slam]


 The seated logo before the fangs grow.


 Seven frames after the seating the "M" fangs have grown about 40% out.


 At Frame 24 they are done and completely extended back to the original size, as I made the model with them out and "squished' them down[ reversed the move].

 
 Here is a screen CAP showing the F.F.D.[ Free-Form-Deformation in 3DSmax ] modifier I animated to get the effect needed.


Project Review
My Babysitter's a Vampire: Disney Channel
Main Title 3D Build-Out and 3D Animation 2011


Client:The Disney Channel via White Spark Creative.
Art Director: Joseph Stamper.
Project Date: January- March 2011.

I had worked with Joseph Stamper when we were both in-house at The Cimarron Group for six years together from 2003 to 2006, and we worked on well over a hundred Movie Posters together, so when he moved over to White Spark Creative, he called me in 2011, as well as using fellow ex-Cimarronian' Motion GFX Guru Tom Kositchotitana to help them create and animate a 3D Logo for a new Disney Channel show called My Babysitters a Vampire.

I had finished out over 80 trailer GFX with Tom K at Cimarron over the years, so we had a simple system worked out already with each other on a project of this nature, and this benefited the client as we can get it done very fast, a T-N-T production as we call it[Tom and Thom].

Joseph supplied the client approved 2D Style frame to me, so step one was to match the 2D look in a 3D world as close as I could. Once this was approved we began a few moves on the type and designed out a way to animate the fangs coming out of the base of the letter "M".

I rendered the raw 3D frames and handed them off to Tom K. for the 2D Motion Graphics work, as well as rendering him a few special passes for various parts of the model. I also provided all other 3D cards for the TV spots for the show as well. There was back and fourth until approved and what you see above are the final RAW frames delivered to MGFX.

The Logo was used in 2D Print, as well as MGFX applications for the series.

Cheers, THOM

Tuesday, May 7, 2013

Project Review Priest: 3D Cross Weapon Build-Out for Motion Graphics Trailers 2010

 The final Virtual Prop Model I re-created and rendered out for Priest[2011].


 The 3D Model was built 100% subdivision for my client uses Maya and I always provide assets that way so they have full use for close up's etc.


 An exploded view shows the various parts to this Cross weapon I made for the Trailers.


 The Mesh wireframe shot for the above shot as well shows my build below the textures.


 A closer view of the Cross blade where the mini side bladed pop out of.

 
 Here is a front and side render of the object.


Project Review
Priest: 3D Cross Weapon Build-Out
for Motion Graphics Trailers 2010

Client: Screen Gems via Greenhaus Graphics
Creative Direction: Helen Greene
Project Date: July 2010.


I regularly build out 3D assets for my Motion Graphics clients to use in their trailers, and I did a Cross Weapon from the film Priest for GreenhausGFX back in 2010 for them, so today a bit of behind the art on my build of the prop.
I was given a screen shot from the film, of the prop in question and as usual I do a bit of reverse engineering and rebuild a functioning 3D Virtual Prop so thy could animate this for a few Theatrical Motion Graphics pieces.

I build out the 3D Asset and export as both a FBX and OBJ so they can use it in their Maya pipeline. A fun project, and about 2 Hrs of work to deliver.

You can review my prior 3D Models I have done for GreenhausGFX here.

Cheers, THOM

Monday, May 6, 2013

3D Model Sales Part XXI Vintage Hanging Socket and Edison Lightbulb 3D Model

 
 The final Model rendered out that I sell online now at Turbosquid as 3D Stock.
 The base Light Socket rendered out on a polished surface.


 The 3D Model is sold online with a pull chain and a thumbscrew switch

 
  A Smoothed render showing off the 3D Model in a multi-view
  A base Polygon render showing inside the bulb.

  A smooth render of the same

  A close up of the threading details on the socket base lower lip.

  A smoothed render showing the area

  A base non-subdivided render showing lamp from below

  A smoothed render at this Worms Eye view.

  A close up render showing the cord connection up top

  A smoothed render of the socket top

  A full view render with cord without subdivision added

  A full render mesh-smoothed at two levels.

  An exploded parts view of all that was built in 3D

  A close up render showing the two ON/OFF meachanics

  A close up render showing the parts for the cord connection


 A close up render showing the parts inside the bulb.


3D Model Sales
Part XXI
Vintage Hanging Socket and Edison Lightbulb 3D Model

Any photo-real 3D render starts with a very accurate and detailed model built out in 3D, so I sell my 3D models I build online as stock 3D models, similar to stock Photography to be used by design and graphics professionals within the various industries online at Turbosquid, the leading stock 3D model house, and today in my PART XXI[21st], I am reviewing a Vintage Electrical item I have built in the past, but did a very high resolution version for sale online as a new 3D Model for sale.

This is a full 100% subdivision model that you can increase the level of detail with the subdivision modifier applied in your program of choice and this model also was built with real threads on the bolts , screws, and even the main housing itself with the mini threads down near the lamp base to add on various attachments that at the Turn of the century were common, as this fitting was seen in every home and business thru out the country. A very high resolution asset.


This would make a great addition to any vintage 3D scene or 3D animation as well as perfect for a steampunk project or illustration.

I export all my 3D assets to FBX and OBJ so my friends in Cinema 4D , Maya, and Soft-XSI can use these assets as well.

To view all my 3D models I sell, you can go here. If you want to see a couple of hundred of 3D models I built in the past that my prior employer still sells, you can go here too.

Cheers, THOM

Friday, May 3, 2013

Online Emoticons 3D Design and 3D Animation PART II :The Bomb, and The Magic "Ocho"2007

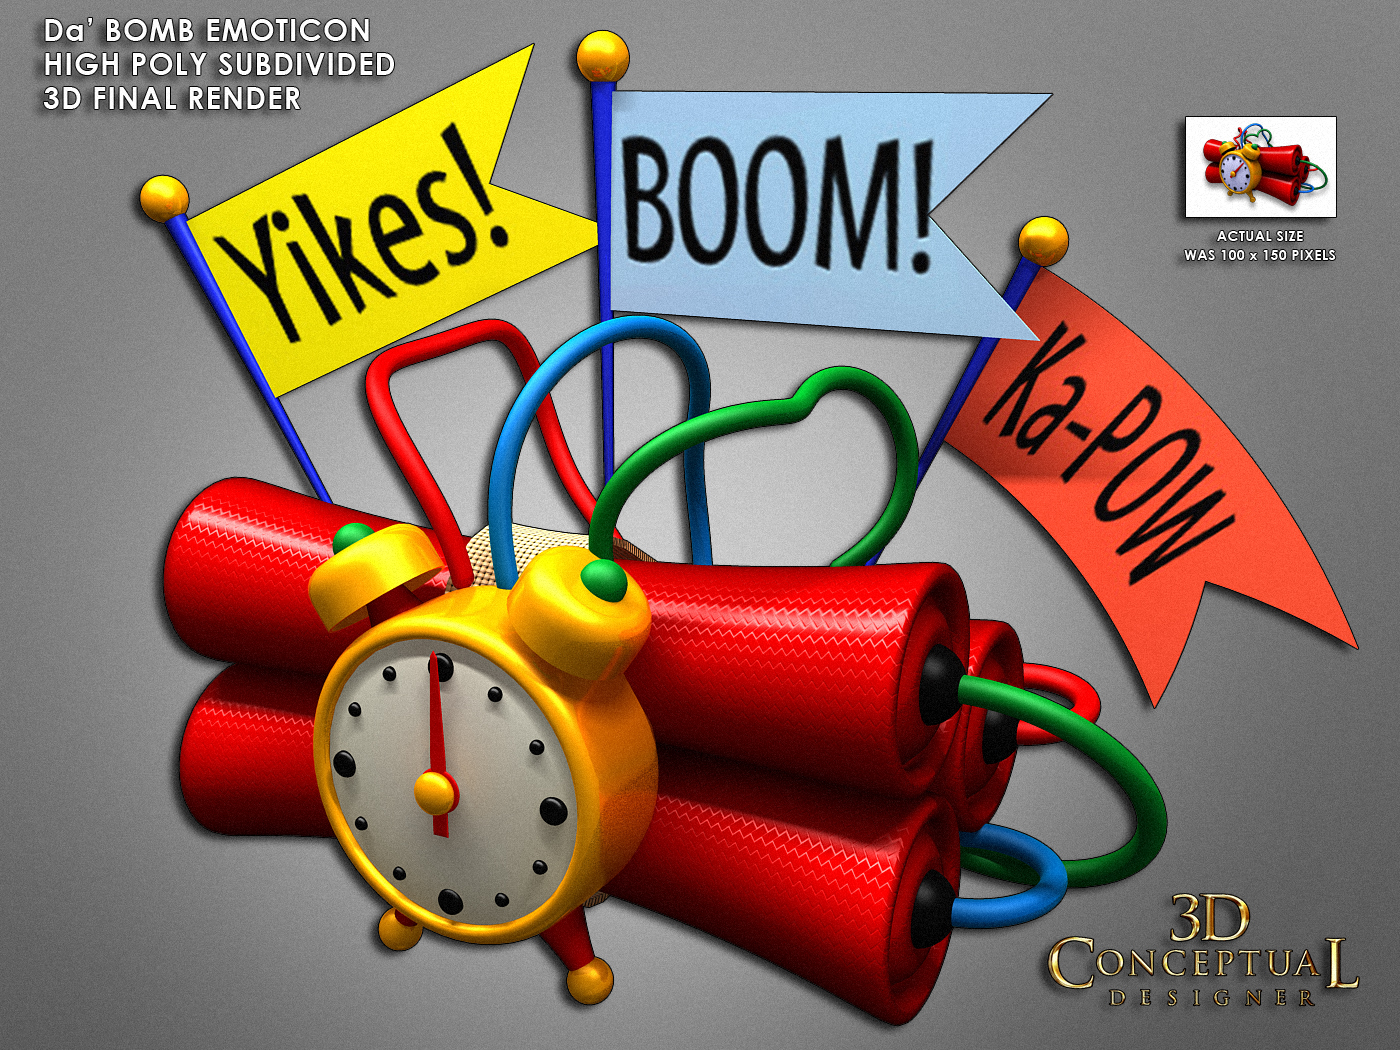
 Here is the final TNT "Da' Bomb" Emoticon I designed, built, and animated in 3D for this mini Icon from back in 2007.


 Here is the Polygon wire-frame showing the subdivided 3D Build.


The Low Resolution view of the TNT stack.


 An exploded parts shot of the little build for this prop. A bit of "Toony" style added to the shapes.


The Final Render of the Magic "Ocho" fortune ball.


The smoothed mesh is a simple modified primitive.


The base Polygon Mesh[ No Subdivision Added]


 An exploded view of the three parts in this simple animated Icon.


Project Review
Online Emoticons 3D Design and 3D Animation
PART II :The Bomb, and The Magic "Ocho"2007

Client: Cimarron Interactive Division.
Art Direction: Scott Addison Clay.
Project Date: May 2007.

In this second part in my series of the quick work I had to create some 3D Emoticons for use on a clients custom built website, I will cover two more Icons I created and animated for the Interactive Division at The Cimarron Group from back in 2007 of a simple Magic Ocho Ball, and a little TNT bundle that blows up with cartoon flags.

I worked in Television animation for a number of years so I was familiar with creating toon styled characters, and these little quick 3D Icons were a fun project to use that skill set on again, as the bulk of my work at the time was 3D Logos and Photoreal 3D Illustrations, so a fun little animated object like these was a nice change up.

I delivered 60 frames of animation for each of the four Emoticons I designed and Animated in 3D for this little gig. Fun and fast!

You can look at PART I here.

                                Cheers, THOM

Wednesday, May 1, 2013

Personal Project: The Hobbit 3D Logo Rendered looks 2008

 First look I did for my take on The Hobbit, was in gold as the Iconic Lord of the Rings was done.

 A pitted aged stone version against a wall.


 A tilted the camera down low and increased the level of aging via the Dirt Shader for the alternate in rough stone.

 A Polished Chrome version of a 3D Logo look for The Hobbit.


 An amber glass version of the Logo, this round I made it double sided so the reflections, refractions, and caustics inside would be better and more complex than with the flat back.

 I increased the face count and added a displacement to the surface to give it a very rough shape, I also blurred out the reflections as this would be an aged look with no real shine.


 An aged Metal look at a slight angle on a gloss floor with a slight reflection for this one.


 A shot in an aged stone with moss growing in the cracks.

Personal Project
The Hobbit 3D Logo Rendered looks 2008

Client: NA
Art Director: Myself.
Project Date: Summer 2008.

In the Summer of 2008 I was an in-house Design Director at a Hollywood advertising agency that does primarily Movie related advertising, so with a new film, The Hobbit then in the works, I wanted to explore some looks for a 3D logo if needed in Print.

Often when I had downtime at Cimarron, I would search the web to see what fun film was being made that we were not working on,and would play around on my own with some 3D looks, and for The Hobbit, that is exactly what I did.

Now in my past position over at the competition, BLT Communications, I worked on Peter Jackson's Lord of the Rings posters as seen here, so I wanted to take this logo to a full 3D Single Point Bevel, as what finished for LOTR and The Hobbit were Photoshop 3D Fakes. I had done quite a few Single Point Beveled Logos in the past so I went that route here too.

I experimented with a few alternates in various aged metals in the gold look as with LOTR, as well as a polished steel, and some concrete and glass too. A fun experiment for me to keep me sharp during a downtime.


Cheers THOM