Monday, March 11, 2013

3D Model Sales: Part XX Rustic Log Fence System

A rendered shot of the fence set up as a smaller pen that I sell online here.


The set of parts that make up this Rustic Log Fencing system I sell online as stock 3D Models.


The non-subdivided view of the base models as exported out to FBX, and OBJ.


A birds eye view shows the variety of rail shapes and profiles used to build out this set.


Each rail is unique in shape and proportion, but will interchange well.


Parts Identification sheet subdivided[ about 500K face count when smoothed]


The Log Fence Set parts as base geometry


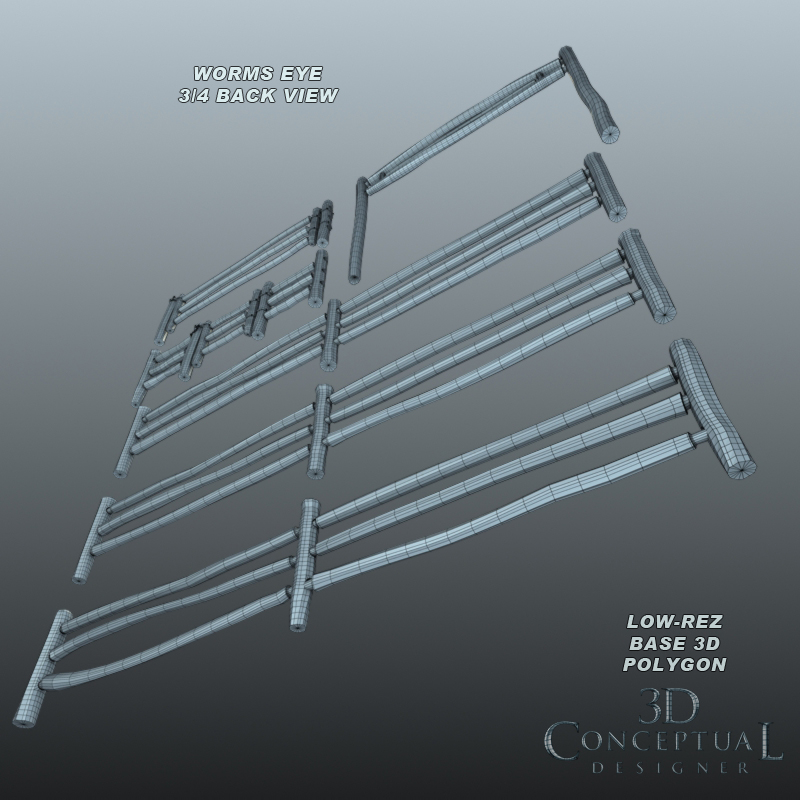
Worms Eye view from the back.


A quad base render from the back.


A close up render on the human gate set shows the rustic hand forged iron hinges as well as the lock-hoop with the chains ready to go to secure hour virtual heard.

The Quad Model itself is shown in this render of the gate with all parts named and groups for easy adjusting.

A close up shot of the rear of the Locking Hoop on the Cattle gate.


A Quad- non-subdividied version of this shot for the FBX and OBJ users to see the way it was built out.

Looking down the side you can see the various shapes and twists in the rails and posts at this angle.

The quad render at that angle highlights the geometrys natural rustic shapes I built out.


The back of the Human Gate closed.


The quad Polygon build render is shown for the back of the Ranch hands gate above.


A Sample render with the gate pivoted open, and the lock raised up.


An ambient render of the sample small pen setup from the first color render up top.


3D Model Sales
Part XX
Rustic Log Fence System

I sell the 3D models I build online as stock 3D models, similar to stock Photography to be used by design and graphics professionals within the various industries online at Turbosquid, the leading stock 3D model house, and for PART XX[20th] today, I am reviewing a rustic styled log fencing system I made so you can create Corrals, animal pens, and any type of fencing you need in a rustic hand peeled log look.

I built this set out to go along with the barn I built last weekend, and this is a great addition to any scene needing a rustic fence in your animation or architectural renders. All gates are grouped and the pivots are aligned so that they swing open and close correctly.


A full 100% subdivision model ensures that you can increase the level of detail with the subdivision modifier applied in your program of choice as high as your processors can handle.

I export all my 3D assets to FBX and OBJ so my friends in Cinema 4D , Maya, and Soft-XSI can use these assets as well.

To view all my 3D models I sell, you can go here. If you want to see a couple of hundred of 3D models I built in the past that my prior employer still sells, you can go here too.

Cheers, THOM

Wednesday, March 6, 2013

3D Model Sales: Part XIX New Monitor Barn

 Here is a Reference render for the Monitor Barn I currently sell on TurboSquid the online Stock 3D retailer here.


 A render front 3/4 view of the subdivided model of the Barn.


 A shot in quads shows the build if the various parts in the Monitor Barn.


 The right side has four dutch doors for the four stalls on each side of this large professional styled barn.

 The parts are 100% subdivision, so the end user can add as much detail to the geometry as their processor will take.

 The back of the barn is almost a mirror of the front with the removal of the stall door replaced by a window.

 The main doors are grouped and slide across to open the barn up


 This elevated view shows off the tin roof and monitor third floor windows all around.


 Each virtual roof section is built separately as would be in the actual construction.


 A shot inside shows the post and beam construction, the wall framing of doors and windows, and the simple 2x12 redwood semi-floored in section on levels two and three.


 With the subdivision modifier removed we see the base geometry, and this is how the exports are for FBX,and OBJ formats for those in other 3D apps.

 An up angle on the front big doors on this Monitor barn.


 All doors are built from 'sticks' so mapping is a breeze.

 
 A Worms-eye render shows the hinge pin details and the rafters under the hot tin roof.


 The Quad Polygon Model shot from the same low angle


 All Main Parts are grouped into sets as seen in this exploded view render of the Farm Barn.


 A shot of the Post-n-Beam framing, all built out subdivision as separate named parts, great for detailed animations and assembly construction animations.

 Here is a peeled back corner view showing the various parts I built to make up the bigger sets with separate boards, battens, framing, rafters, and corbels.

3D Model Sales
Part XIX
New Monitor Barn

I sell the 3D models I build online as stock 3D models, similar to stock Photography to be used by design and graphics professionals within the various industries online at Turbosquid, the leading stock 3D model house, and for PART XVIII[19th] today, I am reviewing a large Monitor styled Barn I recently added for sale here.

I built this as a full 360 turntable model so you can go all around the Architectural Landmark. I also completely framed the structure inside with an Old School Post and Beam method, and all siding is board-n-batten built as individual parts for easy modification or animations needing the building taken apart piece by piece.

All main parts are conveniently grouped for easy selection with, the roof, the rafters, the framing and siding and windows and doors, all set up to grab and adjust fast.


A full 100% subdivision model ensures that you can increase the level of detail with the subdivision modifier applied in your program of choice as high as your processors can handle.

I export all my 3D assets to FBX and OBJ so my friends in Cinema 4D , Maya, and Soft-XSI can use these assets as well.

To view all my 3D models I sell, you can go here. If you want to see a couple of hundred of 3D models I built in the past that my prior employer still sells, you can go here too.

Cheers, THOM

Tuesday, March 5, 2013

3D Model Sales: Part XVIII WEB 3D-Icon Set #1

A shot of three test colors added to the WEB Icons I built out in 3D and sell at Turbosquid.

The base models are low resolution for very fast test animations and real time web applications. Add a Subdivision to get even smoother results for pre-rendered apps.

A 3/4 front view smoothed of the nine basic icons found on almost every website out there.

A quad low-poly view from the front/top.

From the top we see into the double sided trash can.

 With a Subdivision added at level 1 these smooth out well.

A low back view shows that these are 360 degree models ready to move fully around in your UX and UI work.

The base build in front view as exported to FBX and OBJ formats for a variety of graphics use.

A simple front render of the 3D WEB- Icons I sell online here.

A smoothed shot of the Icons from a Birdseye Perspective.

A Birds-eye shot down showing the quad build in low resolution.


 Here is a exploded view showing the various parts I built to create these little 3D web Icons.

3D Model Sales
Part XVIII
WEB 3D-Icon Set #1

I sell my 3D models I build online as stock 3D models, similar to stock Photography to be used by design and graphics professionals within the various industries online at Turbosquid, the leading stock 3D model house, and for PART XVIII[18th] today, I am reviewing a set of nine little 3D Icons that every website has as a 2D item, that I sell online as 3D assets here.

All the familiar Icons including a shopping cart, a trash can, a little printer, a speaker with sound waves for sound, an open envelope for mail, and a big magnifying glass for search, a house for the home page, a padlock for passwords, and a cell phone for a mobile icon are included and great for a bit of 'squash-n-stretch' fun in your animated UI's.


As the web gets more and more animated and 3D, the icons and UI will adjust accordingly up to 3D, and become 3D across a larger segment and area of the web, so these icons are a little sample of designing in 3D what is typically handled in 2D.

A full 100% subdivision model ensures that you can increase the level of detail with the subdivision modifier applied in your program of choice as high as your processors can handle.

I export all my 3D assets to FBX and OBJ so my friends in Cinema 4D , Maya, and Soft-XSI can use these assets as well.

To view all my 3D models I sell, you can go here. If you want to see a couple of hundred of 3D models I built in the past that my prior employer still sells, you can go here too.

Cheers, THOM

Monday, March 4, 2013

Project Review: FOX Home Entertainment 75 Years in Cinema 2010

 The Final 3D Illustration that I built, lit, and textured to provide this render to Menagerie Creative on the FOX Home Entertainment Project almost three years back now.


 A close up showing the level of detail I added to the Camera and Light parts I built out in the scene.


 Here is the Polygon-View of the scene. This is not a subdivision model since I had a faster deadline, and this is where having multiple modeling systems helps as I can offer a a few options.


 The directional hood parts as seen form the side in this detail render.

 
 The number "7" used an old projector and multiple camera parts that are more contemporary.


 A Worms-Eye view looking up the model showing the rivets, screws and various plates and parts that went into this 3D Illustration I did.

Project Review
FOX Home Entertainment 75 Years in Cinema 2010

Client: FOX Home Entertainment via Menagerie Creative.
Art Direction: Cheryl Savala.
Project Date: Summer 2010.

Today I have posted a detailed 3D Illustration I did for Menagerie Creative in the Summer of 2010 for a FOX branded 75 Years in Cinema Key Art Title.

 I was given a 'Frankenstein" comp done up with photos to get an idea of what type of film equipment Cheryl wanted to use to create the big number 75, so I began construction of all the little parts that make up these props.

I built out all the virtual stage lights and camera parts and assembled the full 3D model. I then added in the lighting and textures and did a small Pre-Render to send off for approvals.

After a slight adjustment to the parts, and one more comp round, I did go to a final for the title and delivered it at full resolution. 

This is where 3D shines, because if you did this with Photography the cost would at least double in time and money, and 3D virtual stages like this are always 'Live" since we never 'strike' the set , and therefore we can re-visit the scene years later.

Cheers, THOM