


Personal Project: Volksrod- Vintage VW Hot Rod Salt Flat Inspired Custom
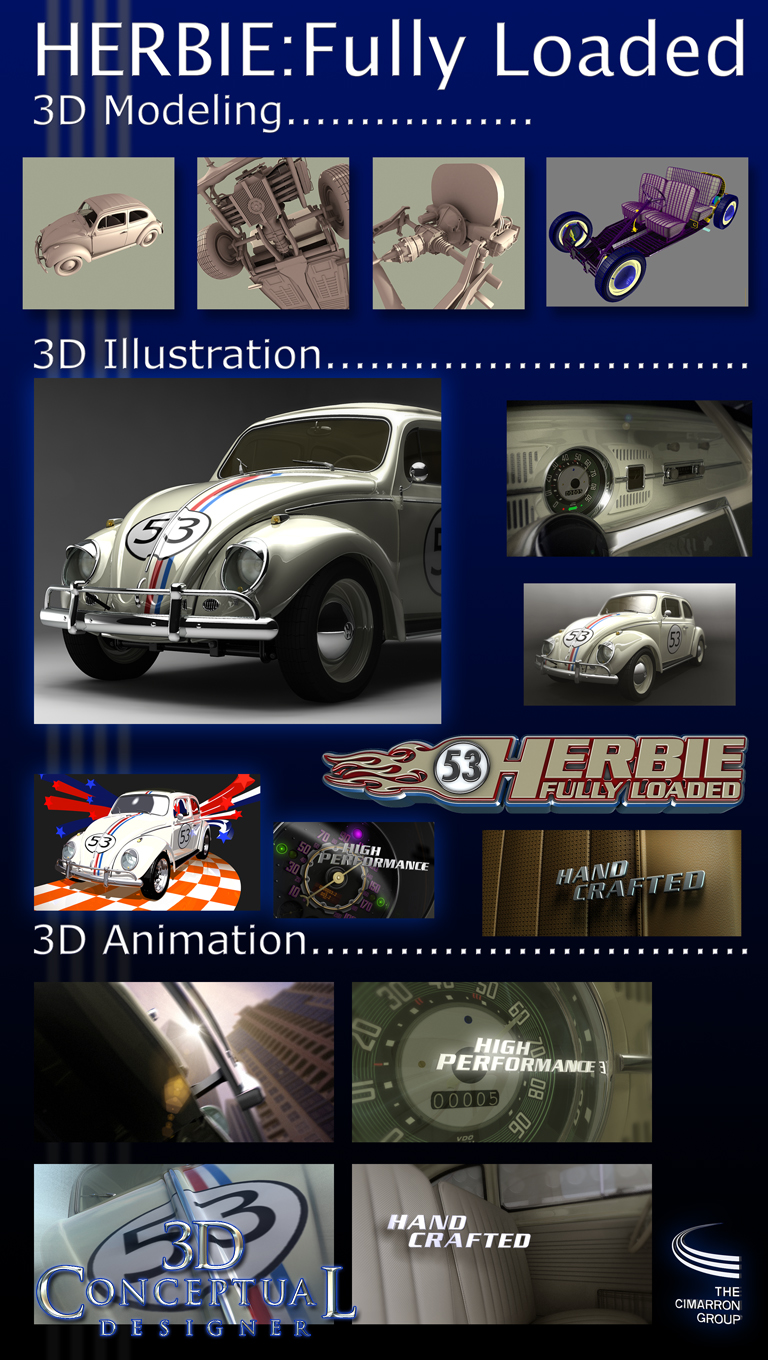
This post is my second in a series on my personal Volksrod project [ Vintage VW Hotrod]. This post is also a Work in Progress [WIP=Work in Progress] post too, so even thought I am near done with the exterior as well as many updates on the twin supercharged motor, I have yet to fully address the interior and I am still using the Herbie stock '63 parts inside for now I built many years back for the Advertising for Herbie Fully Loaded.
I have moved into full colored renders for a few months as I finesse and continue to model, and I have spent most of my time on this Tuxedo black and chrome version. Also, I have spent a lot of time fine tuning the body parts as well as adding in details for placeholder objects from the earlier build as I did start with the 1963 Herbie I made and wanted more accurate parts.
In my continued 3D Modeling in 3DS Max, I have focused primarily on the seen exterior, but I have also revised a lot underneath in both the front and rear suspension areas that are not fully seen in many shots but they are made more accurate for the real build at some future point in life.
On the front end, I rebuilt the Pan head where the torsion bar front suspension attaches to it, so I could mock up how the Ford Deuce rails would attach in there, and added some proposed bracing and attachment points. I also rebuilt the back Trans-axle Horns on the rear pan, as the Herbie mock up was not quite accurate enough to add in the Solid Mounts for the Trans-axle I also added.
Also while under there I added some Vintage performance parts, including a Modified 356 Porsche dual leaf-spring Camber commentator on the Swing Axle, as well as a Engine bar or "Kafer" racing bar on the engine itself. You will also see a vintage Gene Berg Oil sump in there now as well underneath.
Since my last post I rebuilt the engine from the 40HP stock Herbie placeholder I had in there with a high displacement [ 2332cc] adding a proper fully equal length merged with stinger[must have!]exhaust system, along with adding in Dual AMR 500 Superchargers with a custom belt system with a custom center mount fan shroud.
I fine tuned a lot of areas on the body smoothed out the top curve, the rear quarter window, and front quarter panel and added in the Zwitter crotch-coolers. I rebuilt the jack points more accurately, and adjusted the inner fender well louvered panels out front to line up better on the pan. I also took off the headlight eye brows and added 356 Porsche styled headlight grills with matching Hella fog lights with grills below them now. I also used that fog lamp build to add in taillights out back with grills as well.
I also cut into the B-Pillar and added in early Ribbed type Semaphore turn signal arms into the build. I had to chop those a bit as they will need to be shortened for the real life build I plan in the future too. I love Semaphores, a must have on the build and the ribbed versions are available as reproductions so they are available along with most Split sheet metal from Europe.
If interested , I run a Vintage VW's Chop Top group on Facebook for all types of VW chop Top cars, there is a permanent link on the side bar, and you can click here as well as it has some earlier renders in raw steel I did too HERE.
Look for more posts as I continue with this personal project on the interior next with Porsche Speedster 356 seats on deck next.
If you have a 3D Design , 3D Modeling, or 3D Animation needs on a freelance basis, I am set up and and ready to go as I have been a remote studio for over a decade. All referrals are highly appreciated!
You can view PART I here.
Cheers, THOM


